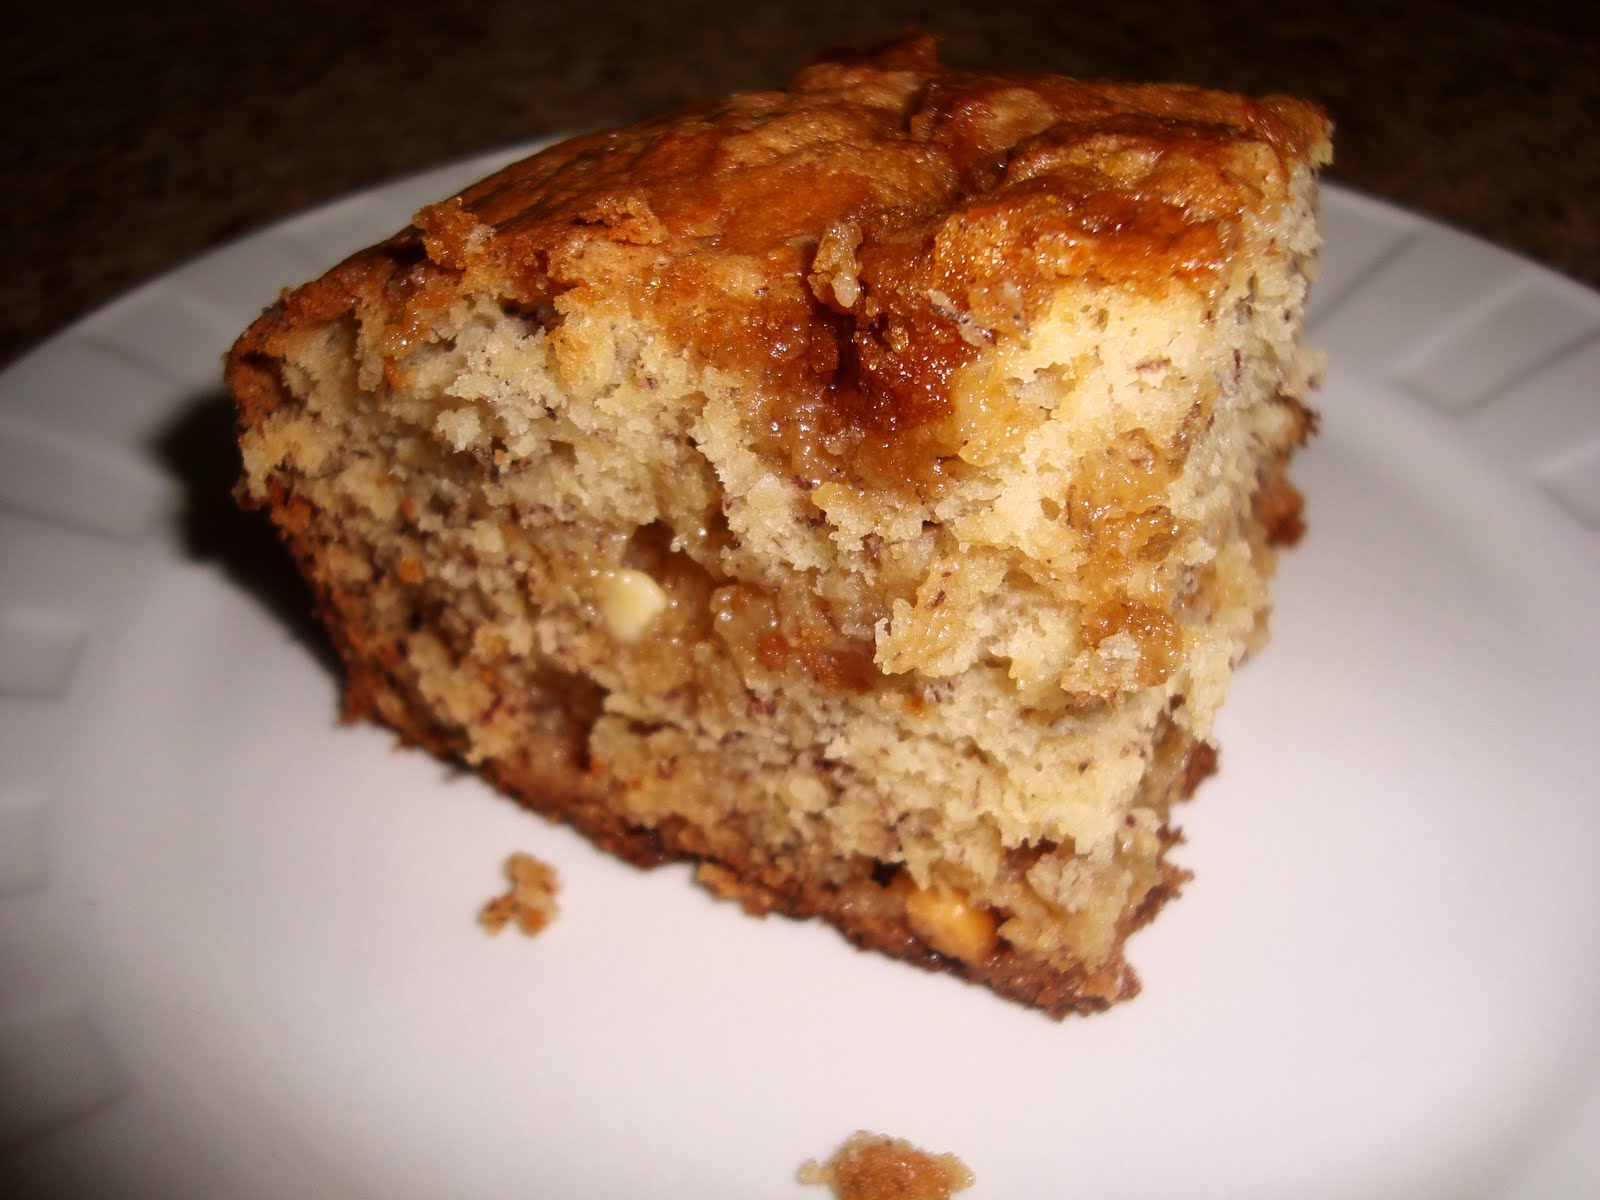
Monday, May 30, 2011

Dinner Rolls

Happy Memorial Day! It's been a great day. We started the day at a Memorial Day service that really reminded me why we celebrate Memorial Day and brought me back to the real meaning of the day. Sometimes it seems we get caught in the hustle and bustle of life and forget how much we really have to be thankful for in our country. If any of you are serving the armed forces or have served, lost a family member or have someone overseas I would like to personally thank you and your family for all of the sacrifices that you have made for our country.

As the weekend winds down it's nice to think that I only have four days of work this week and then off to our first camping adventure of the year. Lots to get ready before then including cleaning out that camper. I'm really looking forward to a relaxing weekend at the lake with family and friends. The weather looks gorgeous for the weekend so I'm hoping mother nature cooperates with us and it holds out for that long. Speaking of weather wow was it a hot and windy one today. We tried to turn our central air on tonight and unfortunately my hubby is sitting on the couch quite defeated because we can't get it to kick in so it looks like we are calling to get it serviced tomorrow. It's only a few years old so hopefully it's nothing major but it could be a toasty one tonight in our house! The recipe that I'm sharing with you tonight was a first for me. I stole my mom's bread maker because she never used it. I remember she got it for some kind of present when I was probably around 10 and it's collected dust ever since one attempt at bread that didn't go to well. Looking back it was one of those presents dad bought for her because he wanted homemade bread. Heads up to the men out there this is not a great idea and it will probably backfire! I'm afraid after she gets a taste of these dinner rolls she might reclaim her bread maker because they were divine. I'm hoping not. I brought them to dinner today at my in-laws and a young gentleman told me they rivaled his grandma's but in case I ever met her I was suppose to keep this on the down low because she might take offense to that! These make wonderful buns for sandwiches or burgers too. Enjoy!

Dinner Rolls
Printer Friendly Recipe

Ingredients

1 c. warm water (80-90 degrees)
2 Tablespoons butter
1 egg
3 1/4 c. flour
1/4 c. sugar
1 tsp salt
3 tsp bread machine yeast or quick-acting active dry yeast

1. Put ingredients in your bread machine in the order listed. Put yeast in on top without letting it touch the wet ingredients. I made a little dent in the top and put the yeast in there.

2. Set your machine on the dough setting then start it. Go have a glass of wine, run errands or take a nap this cycle takes about a hour.

3. When dough is ready, lay it out on a floured smooth surface. Make into a rectangular shape. Cut rolls with a pizza cutter. You should get 15-18 rolls. It really all depends on how big you want your dinner rolls. Pinch rolls into nice shape and brush with melted butter. Cover with clean towel and let rolls rise 30 minutes. They should double in size.

4. Bake at 375 degrees for 12-15 minutes.

Recipe from: Spruce Hill

Labels:

Saturday, May 28, 2011

Rhubarberry Crisp

Today I was outside planting my flowers while my hubby was working on the garage. Yes we have started another project at the Evinks! We are onto building a garage. Of course because we are sooooo lucky we have already found difficulties with it. Our lot slopes about two feet in the backyard which equals a LOT of gravel to build it up. We are talking FIVE loads of gravel! So he was busy leveling out the gravel while I was working on the flowers. During this time I noticed that I have abundance of rhubarb. I know there is some lurking in my backyard that I haven't picked yet and I need too. I think my hubby is starting to get sick of me making more rhubarb desserts/bread/muffins etc. I did promise him I'd make him Pizza Bars because I mentioned making them with my niece last weekend and he's been begging for them ever since then. I can't say that I haven't been craving them also! I still have yet to share the best dessert with you. It's of course my mom's recipe and I have never made it but I'm telling you it's a melt in your mouth to die for dessert that I can't wait for her to make. I'm going to cut that rhubarb in the backyard and hopefully make it next week and share it with you so be on the look out! This dessert has both strawberries and rhubarb in it again and my parents said it was great especially when you top it with ice cream and it's warm and fresh out of the oven. I tried it today with cool whip also. I recommend the warm with ice cream approach! Enjoy!


Rhubarberry Crisp
Printer Friendly Recipe

Ingredients

1 c. flour
3/4 c. oatmeal
1 c. brown sugar
1 tsp cinnamon
1/2 c. butter, melted
3 c. rhubarb
3 c. strawberries or raspberries
1 c. sugar
1 T vanilla
3 T cornstarch

1. Mix together flour, oatmeal, brown sugar and cinnamon; stir in butter. Press half of mixture into greased 9x13-inch pan.

2. Mix rhubarb, strawberries and sugar in a large saucepan; let set for 2 minutes. Stir in cornstarch and vanilla. Cook and stir until thickened. Pour over crust; top with remaining crumb mixture.


3. Bake for 30 minutes at 350 degrees.

Labels:

Wednesday, May 25, 2011

Ham & Cheese Bowties

I still had some ham in the fridge from when I made scalloped potatoes so I found this recipe that I wanted to try with that pesky leftover ham. The hubby absolutely loves cheese, especially mac n cheese so I figured this was the perfect recipe because it's basically glorified mac n cheese with ham. It was super easy to whip up after work and you should have most of these ingredients already in your house. If you don't have Colby cheese you can use whatever cheese you have in your fridge. I served peas on the side but if you get really crazy and daring you can mix them right in. No Parmesan cheese? Use some bread crumbs. The possibilities with this recipe are endless. I should probably put a disclaimer on this recipe *Incredibly Cheesy* Not for the faint of heart! In fact I asked hubby if it was to cheesy. He of course replied it could never be to cheesey in his opinion. I'm off to softball practice! Enjoy!

Ham & Cheese Bowties
Printer Friendly Recipe

Ingredients

16 oz farfalle pasta
1/4 c. butter
1 clove garlic, minced
1/4 c. all-purpose flour
1/2 tsp salt
1/8 tsp ground black pepper
2 c. milk
1/2 tsp prepared mustard
2 c. shredded Colby cheese
2 c. cooked ham, cubed
1/4 c. grated Parmesan cheese

1. Preheat oven to 350 degrees.

2. Bring a large pot of lightly salted water to a boil. Add pasta & cook 8-10 minutes or until al dente, drain.

3. In a large saucepan over medium heat, melt butter. Saute garlic for 30 seconds. Whisk in flour, salt & pepper. Cook & stir until smooth. Pour in milk, a little at a time, stirring constantly. Bring to a boil for 1 minute. Stir in mustard & Colby. Continue to cook stirring occasionally until cheese is melted. Remove from heat & stir in ham & pasta. Pour into a baking dish. Sprinkle Parmesan cheese on top.

4. Bake 30 minutes or until bubbly & golden.

Labels: ,

Sunday, May 22, 2011

English Trifle

This is my potluck creation that I came up with! I knew I wanted to use my Trifle Bowl that my parents gave me for a birthday present many years ago and I found it again when I was cleaning out our closets after our basement project. I've never used it even though I think it's the cutest bowl ever. I also knew that I wanted strawberries in it because my wonderful hubby love strawberries. I thought that I had this recipe tucked away that would be perfect for it in my folder of "I should try recipes". So I started going through that and actually found some other recipes to try. Always a good thing. This recipe isn't quick but it's not hard, just takes a little bit of time to put it all together. Trust me it's well worth the effort! Enjoy!

English Trifle
Printer Friendly Recipe

Ingredients

1 package (3 oz) strawberry gelatin
1 c. boiling water
1 c. cold water
1 prepared angel food cake (8 oz), cut into cubes
1 c. mashed strawberries
1 tsp sugar
1 can (8 oz) unsweetened pineapple chunks
1 c. sliced firm bananas
2 c. sliced fresh strawberries
2 c. cold fat-free milk
1 package (1 oz) vanilla pudding mix
1 carton (8 oz) frozen Cool Whip, thawed
1/4 c. slivered almonds, toasted (I skipped this)

1. In a small bowl, dissolve gelatin in boiling water. Stir in cold water. Pour half of gelatin mixture into a small bow; refrigerate for 1 hour or until slightly thickened. Let remaining gelatin stand at room temperature.

2. Place half of cake cubes in a trifle bowl. In a small bowl, combine mashed strawberries and sugar; spoon half over the cake.

3. Drain pineapple, reserving 1/4 c. juice. Cut pineapple chunks in half; arrange half over mashed strawberries. Toss banana slices with reserved pineapple juice; arrange half of slices over pineapple. Top with 1 c. sliced strawberries. For one of my wedding presents I got this handy little Strawberry Huller. It's inexpensive and I've used it a ton this spring already. Totally recommend the purchase! Spoon refrigerated gelatin over fruit. Refrigerate trifle and remaining gelatin mixture for 20 minutes.

4. In a small bowl, whisk milk and pudding mix for 2 minutes. Let stand for 2 minutes or until soft-set. Spread half of pudding over trifle. Repeat all layers. Top with whipped topping. Cover and refrigerate. Just before serving , sprinkle with almonds.

Labels: ,

Saturday, May 21, 2011

Shrimp Penne with Garlic Sauce

Do you have those recipes where your mouth will start watering as you dream about eating it? Well this is one of them for me, which often makes me wonder why I don't make it more often. The reason is not because it is hard. In fact it's super simple and comes together fast which is always welcome on a week night when you get home from work.Throw together a green salad and make these Garlic Cheddar Biscuits and your meal is done! I really should make this more often. Sometimes recipes just get tucked away in the overflowing recipe box and you forget to take them out again for awhile. I think the ingredient that makes this soooo good is the Seafood Seasoning. Trust me you need this. I get Old Bay Seafood Seasoning. If you don't have it make sure you get it for this recipe. After I finishing posting this recipe I'm off to make a dessert using my trifle bowl I've had forever and haven't used. It's a little bit sad and a little bit funny I get excited about using new cookware and bakeware. We have potluck at church tomorrow so HOPEFULLY it turns out or I'm up a creek without a paddle. Enjoy!

Shrimp Penne with Garlic Sauce
Printer Friendly Recipe

Ingredients

3 c. Uncooked Penne Pasta (You can use any pasta you have on hand)
2 Garlic Cloves, Minced or Grated
1/4 c. Butter, Cubed
1/4 c. All-Purpose Flour
1 can (14 1/2 oz) Chicken Broth
1 can (5 oz) Evaporated Milk
1 lb Cooked Medium Shrimp, Peeled and Deveined
2/3 c Shredded Parmesan Cheese
2 Tbsp. Minced Fresh Parsley
1 1/2 tsp Seafood Seasoning

1. Cook pasta according to package directions. Make sure not to over cook or your noodles turn to mush when you mix it with the pasta sauce!

2. Meanwhile, in a large saucepan saute garlic in butter. I used my hand dandy little grater to grate my garlic and it works amazing. If you don't have one I think it's worth the investment.

3. Stir in flour until blended; gradually add broth and milk. Bring to a boil; cook and stir 2 minutes or until thickened.

4. Stir in shrimp (Make sure they are peeled and deveined!), cheese, parsley and seafood seasoning; heat through.

5. Drain pasta; place in a large bowl. Add shrimp mixture; toss to coat. Serve immediately.

Recipe adapted from: Taste of Home

Labels: ,

Thursday, May 19, 2011

Vanishing Oatmeal Raisin Cookies

Tonight during supper I told my husband that I had this fabulous idea. He hesitantly asked what it was. I said I'm inventing leftover Fridays. That means that whatever is leftover in the fridge on Friday night that's what we eat for supper. He quickly came back with the fact that he eats leftovers for lunch all week, which he does, but we still have leftovers piling up in the fridge and it drives me bonkers! About two hours later we were sitting downstairs. Yes downstairs. It's finished and we can actually sit here and enjoy it!! AMAZING! We have doubled the space we have to live in and it's great. Ok back to the story at hand. We were sitting downstairs and he asks me if we still have a gift certificate to a local bar and grill and I said I thought so. Well he's thinking we should go out to eat tomorrow night to celebrate having the basement done. I started laughing and he couldn't figure out why. I asked him if leftover Friday night was really that awful. He claims he forgot but I'm doubtful on that one! This cookie recipe is awesome. The cookies are soft and chewy just how I like them. They seriously will vanish. I asked Jason what were were going to do with them all since there's only two of us and I used to bring extras to work but we don't have that many people at my new job. He promised that they would be gone in a few days because Julie I'm going to eat at least half a dozen tonight, a few tomorrow morning for breakfast because they do have both oatmeal and raisins and that's a good breakfast, a few for dinner and so on...he has made a big dent in them already. I may have helped him out also. My mom also confessed she stopped over to peak at the finished basement and just may have took a cookie! Enjoy!

Vanishing Oatmeal Raisin Cookies
Printer Friendly Recipe

Ingredients

1 stick plus 6 Tbsp butter
3/4 c. Brown Sugar
1/2 c. Sugar
2 Eggs
1 tsp Vanilla
1 1/2 c. Flour
1 tsp Baking Soda
1 tsp Cinnamon
1/2 tsp Salt
3 c. Quick Oats
1 c. Raisins

1. Heat over to 350 degrees.

2. Beat together butter and sugars until creamy. Add eggs and vanilla, beat well.

3. Add combined flour, baking soda, cinnamon and salt, mix well.


4. Stir in oats and raisins, mix well.

5. Drop onto ungreased cookie sheet. Bake 10-12 minutes until golden brown. Do not over bake. Make sure they are just golden brown on the edges. This keeps the cookie nice and chewy! Cook 2-3 minutes on cookie sheet.
Recipe Adapted From: Quaker Oats

Labels:

Wednesday, May 18, 2011

Enchilada Lasagna

Wow is this weather awesome or what? I know we deserve it and it was a long time coming but it's great. This is three days in a row of great weather. I think we are getting spoiled and it looks like it's back to reality in the next few days with the forecasted gloomy weather. You can truly tell I'm a farm girl at heart. Every morning on my way to work I call my mom and check in to see how the guys are coming in the field. I quiz her about the planting and tillage that they are doing. You can take the girl off the farm but there's no taking the farm out of the girl that's for sure! My mom gets the honor of bringing meals to the field every night. I think this is why some of our hired help actually stay. It's simply for Mom's cooking. I know I would! I was thinking last night, that being the wonderful daughter I am, I should really really volunteer to bring a meal out one night. So I'm thinking I might open my mouth and offer to do that for her as she gets tired of cooking every night like we all do. I don't think I'll be able to test out any new recipes on the guys or I might get fired, wait maybe I should and then I'd never have to do it again! The recipe I'm sharing with you tonight is a new one I tried out last night. It's a little bit different than the typical meat and potato recipe but I'm up for mixing it up every once in a while. So I better share it with you so I can get ready to go to our first softball practice of the year and enjoy this nice weather! Enjoy!

Enchilada Lasagna

Ingredients

8 Flour Tortillas
3 (16 oz) Boneless, Skinless Chicken Breasts, cubed and cooked
1 tsp Cumin
3/4 c. Black Beans
1/2 Red Pepper, chopped
1 Tbsp Olive Oil
1/2 Sweet Onion, Chopped
1 10 oz can Enchilada Sauce
2 C. Mexican Cheese

1. Preheat oven to 375 degrees

2. Heat skillet on medium heat and add olive oil, onions and peppers. Saute until soft, about 5-6 minutes.

3. Add chicken, cumin, 1/2 the can of enchilada sauce, black beans and 1c. of the cheese. Stir unil warm and combined.

4. Spray a 13x9 in baking dish with non-stick spray and put 2 tortillas on the bottom. Top with filling and repeat until tortillas are gone.


5. Top with remaining cup of cheese and drizzle the rest of the enchilada sauce on top.


6. Bake for 25-30 minutes.

Labels:

Sunday, May 15, 2011

Buttermilk Rhubarb Bread

Another weekend has came and went. Can you believe it? I think someone should invent a new work week. We work two days and have five off. Why hasn't this been done yet? It seems like it would be a lot more enjoyable! Today was a rather laid back day but we also got some different things accomplished. We started by going to church with my mom and I read in church and Jason helped my little brother usher. After we were done with that it was off to Mom's for some of her famous Monkey Bread. It was oh so yummy. In between that and church Jason got roped into putting Brent's new door on his house. It's amazing how my wonderful hubby is always in such demand. It seems like someone always needs his expertise that's for sure! I helped mom get her patio furniture out of storage so she could enjoy some time on it this week. It sounds like it suppose to be an absolutely gorgeous week. I think we definitely deserve it that's for sure after the cruddy weather we've been having. When we got home it was on to cleaning out our trucks. I've been waiting to tackle this but the weather doesn't seem to want to cooperate, so today was the day. I bought my truck in December and this is the first official cleaning I've gave it. Let's just say it was long over due! This week should be a fairly relaxed one. We get carpet tomorrow and that's the only thing on the agenda. Oh wait I have my first softball practice Wednesday too...look it's already filling up! Typical right? The recipe I'm sharing with you is a new recipe that I tried. Mom told me she had some rhubarb ready and I was stilling trying to get rid of my extra buttermilk so I goggled rhubarb and buttermilk and this what I came up with! It is very, very good. Jason even said it was pretty good and has been nibbling on it and he doesn't even like rhubarb! It is moist and has the most wonderful topping on it. Enjoy!


Buttermilk Rhubarb Bread
Printer Friendly Version

Ingredients

3/4 c. Brown Sugar
1/3 c. Vegetable Oil
1 Egg
1/2 c. Buttermilk
1/2 tsp Salt
1/2 tsp Baking Soda
1/4 tsp Cinnamon
1 tsp Vanilla
1 1/2 c. Flour
1 c. Rhubarb, diced
1/3 c. Chopped Pecans, Roasted (I skipped this!)
1/2 c. White Chocolate Chips

Topping
2 Tbsp Sugar
1 tsp Butter, melted
1/4 tsp Cinnamon

1. Mix all bread ingredients together.

2. Generously grease a bread pan. Pour batter into pan.


3. In a small bowl combine topping ingredients. Sprinkle over batter.

4. Bake at 325 degrees for 55-65 minutes or until it test done.


5. Allow to cool before tipping out of pan. If you don't it will come out in pieces. This is your warning! :)

Adapted from: Eating Out Loud

Labels:

Saturday, May 14, 2011

Scalloped Potatoes with Ham & Cheese

Wow what a day! I started by getting up and going to they gym. When I got home my little bro called and stopped by because he missed me :) We had a nice chat and after he left it was on to touch up paint in the basement. Jason and I were on a mission today to get the basement ready for carpet on Monday. We successfully accomplished that! We did touch up paint, Jason finished the bathroom vanity doors and drawers, we pledged all the wood work, swept and vacuumed! It looks awesome and I can't imagine how great it's going to be to actually enjoy the time down there. I also cleaned the upstairs and did some laundry. After saying how productive I was to Jason and that I even cleaned up stairs. He had to politely inform me that guess what Julie...you have like twice the amount of house to clean now that the basement is done. Wonderful, that was a great comment hunny! In between all that activity I made a great supper. I've been waiting to make this recipe on a day I had a while because it takes about an hour and a half to cook. It was a dreary, raining day and it was the perfect day for it! This Scalloped Potato and Ham recipe is awesome. I know I already have a recipe on here for this but it's a Crock-Pot one. And yes I know I could just bake it but why not mix things up and have two recipes?! I also made Buttermilk Rhubarb Bread tonight and it was also amazing...and that recipe will be coming later...not to tempt you or anything!

Scalloped Potatoes with Ham & Cheese
Printer Friendly Recipe

Ingredients

1 can (10 3/4 oz.) Condensed Cream of Mushroom Soup, Undiluted
1 C. Milk
2/3 C. Condensed Cream of Potato Soup, Undiluted
1/2 C. Chopped Onion
1/4 C. Butter, Melted
1/2 tsp Minced Garlic
1/2 tsp Pepper
1/4 tsp Seasoned Salt
8 Medium Red Potatoes, Peeled and Thinly Sliced
3 C. Cubed Fully Cooked Ham
1 1/2 C (6 oz) Shredded Part-Skim Mozzarella Cheese

1. In a large bowl, combine the first eight ingredients. Add the potatoes, ham and cheese; toss to coat. Transfer to a greased 13 in. x 9 in. baking dish.

2. Baked, uncovered at 350 degrees for 1 1/2 hours or until bubbly and potatoes are tender. Let stand for 10 minutes before servings so the sauce can thicken.

Labels:

Friday, May 13, 2011

Mom's Buttermilk Pancakes

TGIF! Oh thank goodness it's Friday. I say this every Friday so it's not like it's been that rough of a week or anything. I'm just always happy when the weekend comes. Then it flies by and I'm right back at Monday. I haven't been ignoring you all this week. Actually the program that I use to post my blog has been experiencing some technical difficulties so I was stuck waiting till they fixed the problems. I'm back now! This week we have been getting ready for the carpet in the basement to come on Monday. We've been just a trucking away on it. Actually I'm going to say that Jason is has been truckin' more than me. He's a bit more handy in that department! My mind has been racing trying to figure out just how I'm going to decorate it down there. His focus has been on things like making the cabinet for the dart board, or when we can go and get my mini fridge from my parents so he has a place to store his beer downstairs. You know it's a lot of work to come up those stairs and get a beer! This weekend we'll hopefully finish getting the basement ready for carpet. Other things on the agenda include not much actually for once. I'm looking forward to hopefully finding a little bit of down time to hang out with my hubby sometime this weekend! On to the recipe that I'll be sharing with you. I noticed I had some buttermilk from a previous recipe that I needed to use up when I was getting my lunch ready this morning. I was looking for a recipe that included buttermilk today and I came across these pancakes. It seemed like the perfect supper. I love breakfast for supper every once in a while and it was such a dreary and cold day that pancakes it was! This isn't my mom's recipe...it's just the title of the recipe....since you know I steal a lot of recipes from her I thought I better clarify that! These pancakes were light and fluffy and the batter was super easy to mix. I definitely will make again if I end up with buttermilk on hand!

Mom's Buttermilk Pancakes
Printer Friendly Recipe

Ingredients

1 c. flour
1 tsp salt
1 tsp baking soda
1 Egg
1 1/8 c. Buttermilk
2 Tbsp butter, melted

1. Preheat and lightly grease a large skillet or electric griddle.

2. Mix the flour, salt and baking soda together in a bowl.

3. Ad the egg, buttermilk and butter. I would whisk the egg before I added if I were you. My egg didn't want to mix in and I think this would have helped. It's important that you lightly stir the batter together. You want it to have a few lumps and look thick, spongy and puffy. If you over stir it the pancakes won't be as light and fluffy.


4. Drop 1/4 c. of the better onto the cooking surface, spreading lightly with the bottom of the cup to even out the batter. Cook until lightly browned on each side, about 1-2 min per side. The batter will start to form bubbles on the top when you need to flip it.


Yes I do realize that my pancakes don't look quite as perfect as Perkins!

Jason dug in right away!

Recipe adapted from All Recipes

Labels:

Thursday, May 5, 2011

Banana Crumb Snack Cake

Here it is!!! The long awaited recipe that I described as SCRUMPTIOUS. It really is. I'm not exaggerating or anything. In fact as I just walked up the stairs Jason yelled...are you going to make me another banana crumb cake even though we still have leftovers. I think that explains everything right there. I haven't made it for awhile and I had a few very ripe bananas and had all the ingredients on hand so I decided to make it. Man...I think now that maybe I shouldn't have because I can't keep my fingers out of it. In fact I had to hide the pan on top of the fridge because every time I walked by I had to stop and grab a piece. Make it for yourself and let me know what you think!


Banana Crumb Snack Cake
Printer Friendly Version

Ingredients
2/3 C. Slivered Almonds
1/4 C. Packed Brown Sugar
2/3 C. Butter, softened
1 1/2 C. Sugar
2 Eggs
3/4 tsp Almond Extract
3 C. All-Purpose Flour
2 tsp Baking Soda
1/4 tsp Baking Powder
2 C. Mashed Ripe Bananas (3-4 Bananas)
1 C. (8 oz) Sour Cream
1 C. Vanilla or White Chips

1. In a small bowl, combine almonds and brown sugar; set aside (I omitted slivered almonds for Jason but I have used them and they are awesome on this cake!).

2. In a large mixing bowl, cream butter and sugar until light and fluffy. Add eggs, one at a time, beating well after each addition. Beat in extract.


3. Combine flour, baking soda and baking powder; add to the creamed mixture alternately with bananas and sour cream. Fold in white chocolate or vanilla chips.

4. Spread into a greased 13x9x2 in baking pan. Sprinkle with reserved almond mixture.


5. Bake at 350 degrees for 35-40 minutes or until a toothpick inserted near the center comes out clean. Cool on a wire rack.


Shared on the following sites - Please give them a visit!

Labels:

Wednesday, May 4, 2011

Herbed Potatoes & Green Beans

I've officially survived three days of work at my new job! On Monday I woke up with a horrible cold. Like the worst one I've had all winter. Of course. Perfect. First day of my new job. I had a ton of sick days at my old job I never used but noooo I couldn't get the cold last week. So I toughed it out and went in. I'm sure I was super impressive blowing my nose every three minutes but I got through it and maybe even retained a little bit of the information I was told. I'm feeling much better and over the last few days have retained even more information. I keep telling them I'd like to just fast forward about a month so I was a little bit comfortable with things. So far I'm really enjoying the things I have learned and am still excited about the job. Good sign right?! I emailed my friend today and told her the only thing I have to complain about is the fact that I haven't figured when to get my work out in every day. She informed me that if that's the only thing I have to complain about so far I'm doing pretty good! The workout complex - I tried working out after supper last night and well full stomach + workout = not productive workout. Today I tried working out after work. It was ok but the gym was full and all I could think about was man I wish that I could go back to my normal workout before work. The thing is I have to be to work an hour earlier and I have a 15 minute drive now. So tomorrow morning I'm going to rise at the crack of down and try out the workout before work. I'll let you know how that goes! It's just so nice to be done with work and not have to dread the fact that you still have to workout! Ok enough about me and onto this recipe again. I had picked up some fresh green beans at the grocery store last week and saw this recipe and figured I'd try it since I can always use a different side dish. It turned out great and it was a nice change of pace. Enjoy!

Herbed Potatoes & Green Beans
Printer Friendly Recipe

Ingredients

12 oz potatoes (3 small russet or 5 red potatoes approximately)
1/2 lb green beans, ends trimmed
Chicken Broth - At least two cups
1/2 Tbsp dried minced onion
1/2 tsp garlic powder
1/2 tsp onion powder
Paprika
3 green onions, diced (I omitted this of course!)
Salt & Pepper

1. In large skillet with lid, spray surface with cooking spray. Turn heat to medium and add potatoes. Flip after 5 minutes and brown other side.


2. Pour in about 1 c. chicken broth or until potatoes are about half covered with broth. Cover and allow to steam over medium/low heat 5-10 minutes until liquid is almost absorbed.

3. Add 1 cup more broth or half way up potatoes again. Add green beans, minced, onion powder and paprika. Stir. Replace lid and allow to steam 5-10 minutes. Once veggies are cooked through turn up heat and reduce broth. As it thickens stir to coat veggies.


4. Season with salt and pepper. Top with minced onions - I of course skipped this step!

Recipes from: Stephanie Cooks

Labels:

Sunday, May 1, 2011

Easy Baked Parmesan Tilapia

Another week is right around the corner and this recipe will provide a simple and fast meal that we can always use in life! I hope you had a great and relaxing weekend. I had a great weekend, but not very relaxing which is fine. We went to Jason's friend's wedding in Buffalo on Saturday and stayed overnight. The wedding was beautiful. It also was wonderful listen to the couple take their vows and the Pastor's sermon. It really reminded me about all the things I have to be thankful for in life especially my marriage. It had it's comical parts when the Pastor reminded the couple that some days they really won't like each other but to remember standing in front of their guests saying their vows and why they loved each other then and now. Isn't that true? I know I've only been married for about 8 months but some days it's like wow I just need some ME time and space but when you look back on it you wouldn't change a thing. The main thing is to remember that the other person probably feels like that about you sometimes too! I love my husband dearly and he's a blessing to me but two people have their difference which I'm sure you can all relate too :) Ok off my soap box and onto the recipe. This recipe is AMAZING. The first time I made it I actually said I felt like I was eating in a restaurant it was so good. I've already went out and bought more tilapia to make it again. This is a huge thing in my life because I rarely make recipes twice this close together! PS This recipe is for my mom. She was asking what to do with her tilapia and I said I had just tried the perfect recipe for her to try. See...I share with her too. I don't just steal all her recipes!

Easy Baked Parmesan Tilapia
Printer Friendly Recipe

Ingredients

4 Tilapia Fillets
3 Tbsp butter, melted
1/4 c. grated Parmesan cheese
1 garlic clove, minced
1/4 tsp thyme
Salt & Pepper
Lemon Slice (Optional)

1. Preheat oven to 400 degrees.

2. Pat tilapia dry (If frozen thaw tilapia first) with a paper towel. Season with salt and pepper.

3. Lay on a baking sheet sprayed with non-stick spray (Make sure it has sides. I didn't and I had butter running all over the oven and Jason's comment was...make sure you tell the people to have sides on their pan when you post this on your blog!). Bake 10-12 minutes.


4. While fish is baking, mix butter with garlic, thyme & Parmesan cheese. It says to mince the garlic clove but I actually grated the clove on my hand grater and it worked great!


5. Remove fish from oven and GENTLY flip (I tried to be gentle..it didn't go so well and I ended up with the fillets falling apart slightly). Spread the butter mixture on the fish and heat the broiler in your oven. Set fish under the broiler for about 2-3 minutes or until cheese gets golden brown and bubbly. Serve with lemon.


Enjoy! This one won't dissapoint!

Labels: